The Data Explorer Toolbar
The Toolbar allows you to expand, collapse, print preview, print and customize the current view.

The icons on the toolbar perform the following functions:
| Icon |
Function |

|
Expand All: this causes all group headings in the result set to be expanded whereas Collapse All causes all group headings in the result set to be collapsed |

|
Show/Hide graph: this toggles the panel at the bottom of the screen on and off within the Crosstab Analyzer. It is only active within the Crosstab Analyzer. |

|
Display/Hide the Crosstab Analyzer: the toggles the Crosstab Analyzer screen on and off |

|
Click on the button to display the three options:
- Group panel: this toggles the group header panel on and off. The group
header panel allows you to group “like” data such as companies or departments together.
- Footer: this toggles the footer panel on and off. The footer panel shows
any pre-defined or custom group totals and grand totals
- Filter Toolbar: this allows you to display or hide the filter toolbar at the bottom of the results panel, from which you can select fields by which to filter your data.
|

|
Field Chooser (also known as the customize form): this displays a pop-up list of the data fields that
you can choose from for the current query. These fields can be dragged onto the results grid where
you want them to be placed. |

|
Click on the button to display the three print options:
- Printer: this prints a WYSIWYG copy of the current query layout, directly to a nominated printer. If a row
or column node is collapsed, then the printout will show it collapsed.
- Print Preview: this is a WYSIWYG (What you see is what you get) preview of the current query layout,
displayed to screen. If a row or column node is collapsed, then the preview will show it collapsed.
- Page Set-up: this is used to define the page set-up/layout for printed copies. As some of the query reports you define may be physically wider than one page, the Page Setup button allows you to specify the ‘Z Order’ of the printed report, either ‘Down, then over’ or ‘Over, then down’. An alternative is to use the Page Scaling (i.e. Fit to page) option. You should experiment with these settings to see which one gives you the desired results.
|
|
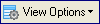
Click on this button to display the four view options detailed below: |
|

|
Save Current View: this allows you to save the current view over an existing view or as a new view |
|

|
Delete Current View: this deletes the current view.
 The “Default View” cannot be deleted. The “Default View” cannot be deleted.
|
|

|
Load an Existing View from a File: this allows you to load an existing view from a previously saved file. |
|
|
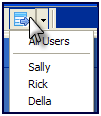
Publish Current View to: this allows you to release the current view to all or specifically selected users. |

|
Export Current Grid contents: this allows you to export the contents of the current view to Excel, Text, HTML, XML or CSV |

|
Email: this allows you to attach and email the current view in Excel, Text, HTML or CSV. |
Return to Overview of the Data Explorer
Data Explorer Desktop
